Export a report as a database table
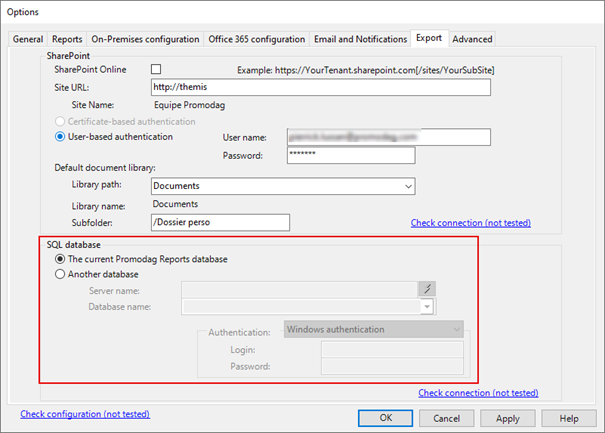
You can export any report to a database table. The destination database will be defined in the Export tab of Tools > Options. The database to which Promodag Reports is connected is selected by default, but you can define any other SQL Server database, the server on which it is hosted and the credentials of a user who has the necessary permissions to create a new table.

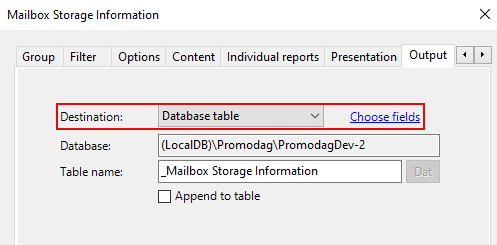
Next, set the output of your report to Database table.

To filter the exported data or add additional properties for export, click on the Choose fields link.
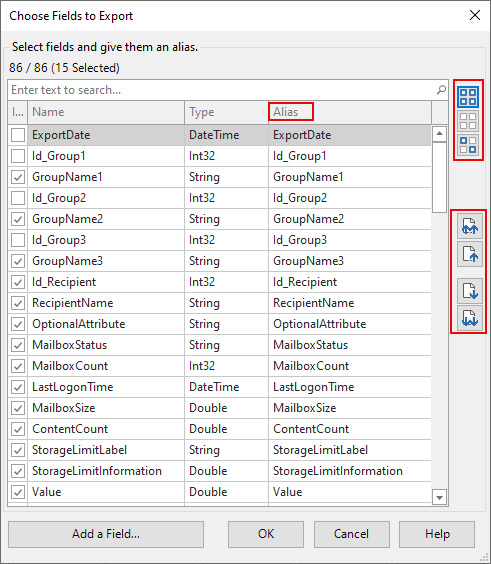
The Choose fields to export window shows all the properties available for the selected report. Those which are present in the report's output screen are ticked. Note that these properties may vary depending on the level of detail selected (Content tab) if this option is present.

You can select and deselect all the properties displayed in the grid or invert the selection using the buttons on the right of the window and change the order of these properties using the arrows. You can select and move several properties simultaneously by pressing the Ctrl key.
If the final table is to be used by another system and its structure needs to contain one or more additional fields that the report does not offer, you can add empty intermediate fields using the Add a field button.
Finally, the Alias field on the right can be edited and used to change the name under which the field will be exported, for example "Number of messages sent" instead of "Snd_Nbr".
You can now choose the name of the table to be exported (by default, this will be the name of the report in Promodag Reports preceded by a _) and then run the report.
If you wish to add data to an existing table, you will later tick the Append to table box. To distinguish between new data and data that has already been exported, you will need to have selected the ExportDate property when you first run the report.
Comprehensive Exchange reporting made simple for Office 365, On-Premise, and Hybrid environments
Start your free 45-day trial of Promodag Reports
